

There’s nothing worse than spending a weekend painting your kitchen cabinets, only to watch the paint chip and peel a few months later. That beautiful new look quickly becomes a frustrating reminder of a job done wrong. The difference between an amateur result and a professional, factory-like finish comes down to one vital factor: knowing exactly how to prep cabinets for painting. It’s the single most important step for a durable result, and it’s where most DIY projects fail.
In our 38+ years of cabinet refinishing, we’ve seen how skipping the right prep work leads to disaster. That’s why we’re cutting through the confusion to give you our straightforward, no-nonsense guide. Forget guessing which sandpaper to use or if you really need primer. We will walk you through the non-negotiable process we use every day to guarantee a smooth, flawless finish that stands up to daily use. Follow our professional steps, and you’ll achieve a durable result you can be proud of.
Key Takeaways
- Proper preparation is the most vital factor for a paint finish that won’t peel or chip, making up 80% of the work.
- Discover the specific degreasing method professionals use to eliminate invisible kitchen grease, the number one enemy of paint adhesion.
- Understand the real goal of sanding when learning how to prep cabinets for painting; it’s about creating “tooth” for primer, not stripping the old finish.
- Learn why a high-adhesion primer is a non-negotiable step that acts as the essential “glue” between your cabinets and the new paint.
Why Proper Prep is the Most Critical Step in Cabinet Painting
When it comes to cabinet refinishing, the final coat of paint is just the tip of the iceberg. The real work-the part that determines whether your finish lasts a decade or peels in a year-is the preparation. We know that proper prep accounts for 80% of a professional, factory-like finish. Skipping these steps is a recipe for disaster, leading to peeling, chipping, and a blotchy, uneven look that screams amateur.
To better understand the initial steps, see this helpful video on preparing cabinet boxes:
A lasting finish isn’t just about paint; it’s about creating a perfect surface for that paint to bond to. This is the fundamental principle behind how to prep cabinets for painting correctly. The entire process rests on four vital pillars: complete Disassembly, meticulous Cleaning, strategic Sanding, and the application of a high-adhesion Primer. This is the system that separates a temporary, 2-year fix from a durable, 10-year investment in your home.
The Difference Between a DIY and Professional Prep Job
A professional doesn’t just wipe down a cabinet; we decontaminate it. Years of kitchen grease, oils, and cleaning residues create a barrier that paint cannot penetrate. Our goal is to achieve perfect mechanical adhesion, which requires a surgically clean and properly abraded surface. For a deeper dive, understanding the wood finishing process is key. We use specialized degreasers and sanders to ensure the primer has a flawless foundation to grip.
Common Mistakes to Avoid Before You Even Start
Learning how to prep cabinets for painting also means knowing what not to do. Avoid these common pitfalls that ruin countless projects:
- Inadequate Cleaning: Wiping with a simple household cleaner is not enough. Invisible kitchen grease is the number one cause of paint failure and must be completely removed with a powerful degreasing agent.
- Improper Sanding: Using the wrong grit sandpaper-or worse, skipping it-leaves a surface that is too smooth for the primer to bond with. Sanding creates microscopic scratches, or a “tooth,” for the primer to grab onto.
- Wrong Primer Selection: Not all primers are created equal. Using a standard wall primer on slick, sealed cabinetry will lead to peeling. A high-adhesion, stain-blocking bonding primer is non-negotiable for a professional result.
Step 1: Systematic Disassembly and Workspace Setup
Before you pick up a sander or a paintbrush, the first physical step in how to prep cabinets for painting is creating an organized workflow. This is not a step to rush. A professional finish is built on a foundation of systematic work, and that starts here. Skipping this stage is a classic mistake made by amateur house painters, leading to lost hardware, mismatched doors, and a chaotic, inefficient process. Taking thirty minutes to properly disassemble and label everything will save you hours of frustration during reassembly.
The Right Way to Label Everything
Your goal is to make reassembly foolproof. A simple numbering system is the most effective method. Start by creating a basic map or sketch of your kitchen layout. Then, follow these exact steps:
- Assign a unique number to every single door and drawer front, starting at one corner of the room and working your way around.
- Write that number on a piece of masking tape and place it on the back of the door or drawer.
- Place a corresponding piece of tape with the same number inside the cabinet box or drawer opening where it belongs.
- As you remove hinges and hardware, place them in a labeled Ziploc bag that corresponds to the door number. Do not mix hardware.
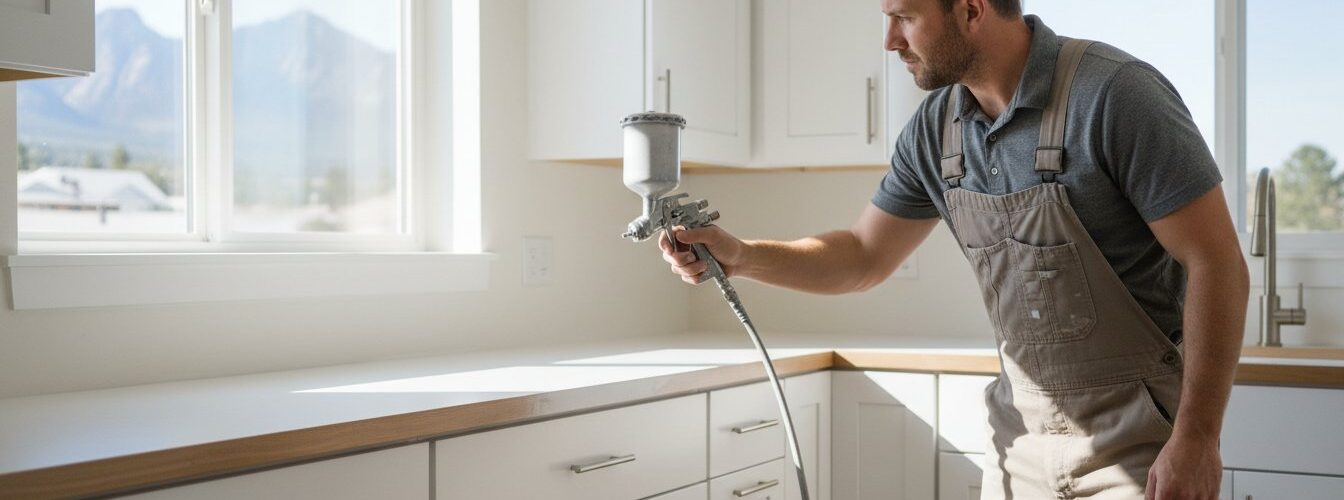
Creating an Efficient Painting Station
Your kitchen is a home, not a spray booth. You must set up a dedicated, separate area for the actual painting work. This space should be well-ventilated, clean, and as dust-free as possible. Lay down heavy-duty drop cloths to protect floors. Ensure you have bright, direct lighting; poor light will hide drips, dust, and other imperfections until it’s too late. To achieve a flawless finish on all sides, you must elevate the doors off your work surface. Use painter’s pyramids or drive screws into the back of the doors to create legs. This professional setup allows you to execute each step correctly, following the technical standards for wood preparation found in guides like the USDA Forest Service Wood Finishing Handbook, which details the science behind proper finish adhesion.
Step 2: The Critical Cleaning and Degreasing Process
If you get one thing right about how to prep cabinets for painting, make it this step. Cleaning is the absolute foundation of a professional, long-lasting finish. Over years of use, kitchen cabinets accumulate a thin, often invisible layer of grease, oil, and grime. This residue is the number one enemy of paint adhesion. Painting over it is a guaranteed way to see your new finish peel, chip, and fail within months. This is a mistake amateur house painters make all the time.
Before you begin scrubbing, a critical safety note is in order. If your home was built before 1978, your cabinets could have lead-based paint. Disturbing this surface without proper precautions is hazardous. We strongly advise consulting the EPA’s guide to lead-safe renovations before proceeding with any prep work.
Choosing the Best Cleaner for Kitchen Grease
Do not use common household sprays like Windex or furniture polish. These products often contain silicones or waxes that leave behind a film, which will repel your paint. You need a dedicated degreasing agent to cut through the grime effectively. Your best options include:
- TSP Substitute: A powerful cleaner that is safer to handle than traditional Trisodium Phosphate (TSP) and requires less rinsing.
- Dedicated Degreasers: Products like Krud Kutter or Simple Green Pro HD are excellent, readily available choices designed to dissolve tough grease without damaging the wood. Always read and follow the manufacturer’s instructions for dilution and safety.
Our Pro Technique for a Squeaky-Clean Surface
For a truly clean surface, you need the right tools and a solid method. We use a two-bucket system. One bucket holds your diluted cleaning solution, and the second holds clean rinse water. Work in small, manageable sections. Dip a non-abrasive scrub pad into the cleaner, scrub the surface thoroughly, then use a clean rag and the rinse water to wipe away all residue. Change your rinse water frequently to avoid re-contaminating the cabinets. Once completely dry, a final wipe with a tack cloth removes any remaining dust or lint.
Don’t Forget the Cabinet Boxes!
The doors and drawers are only half the job. The cabinet frames, or boxes, attached to your kitchen walls need the exact same meticulous cleaning. This is often the most tedious part of the process, but it is not optional. Before you start, take the time to tape off the surrounding walls, backsplash, and countertops to protect them from the cleaning solution. A properly cleaned cabinet box ensures the entire project has a uniform and durable finish.

Step 3: Sanding for Adhesion, Not for Stripping
A major mistake in cabinet prep is sanding with the wrong goal. You are not trying to strip the old finish down to bare wood. The primary purpose of sanding in this process is to “scuff” the surface. This light abrasion removes the surface gloss and creates a microscopic texture, often called a “tooth.” This tooth is what allows the primer to physically grip the cabinet, forming a strong mechanical bond that is absolutely vital for a durable, long-lasting finish. Without this step, even the best paint will eventually peel and chip.
Understanding how to prep cabinets for painting means knowing which tool to use. For large, flat areas like door panels and cabinet sides, an orbital sander is fast and effective. For detailed trim, inside corners, and profiled edges, nothing beats the control of hand sanding with a flexible sanding sponge. Professionals use both to guarantee every square inch is perfectly prepared for primer.
What Sandpaper Grit Should You Use?
Using the correct sandpaper grit is critical. The wrong choice can damage your cabinets or fail to create enough tooth for proper adhesion. Stick to this simple formula:
- 120 to 180-Grit: This is the ideal range for your initial scuff sand. It is aggressive enough to de-gloss the existing finish without leaving deep, visible scratches in the wood or MDF.
- 220-Grit: Reserve this finer grit for sanding lightly between your primer and first topcoat. This step knocks down any raised grain or tiny imperfections, creating a glass-smooth foundation for your final coat.
- Avoid Coarse Grits: Never use a grit below 100. It is far too aggressive and will gouge the surface, leaving deep scratches that are almost impossible to hide with paint.
Techniques for Flat vs. Detailed Areas
Your objective is a consistently dull surface with zero shiny spots remaining. On flat panels, use a sanding block or orbital sander and always move in the direction of the wood grain to avoid cross-grain scratches. For any grooves, routed edges, or detailed trim, a flexible sanding sponge is the best tool. It conforms to the contours of the wood, ensuring you scuff every part of the surface evenly. When finished, the entire cabinet piece should have a uniform, matte appearance.
The Importance of Tack Cloths and Vacuums
Sanding creates a huge amount of fine dust. If this dust is not completely removed, it will mix with your primer and ruin the finish, leaving it gritty and rough. This cleanup step is non-negotiable. First, use a shop vacuum with a soft brush attachment to remove all visible dust from every surface, corner, and crevice. Immediately follow up by wiping down every surface with a high-quality tack cloth. These sticky cloths are designed to pick up the fine dust particles that vacuums miss. The surface should feel perfectly smooth and clean to the touch before you even think about opening a can of primer.
Step 4: Applying a High-Adhesion Primer
After all the cleaning and sanding, your cabinets are finally ready for the most critical bonding agent in the entire process: primer. Think of primer as the molecular glue that fuses your new paint to the cabinet surface. Skipping this step is a mistake that amateur painters make, and it guarantees a finish that will chip, peel, and fail within a year. A quality primer is non-negotiable for a professional, long-lasting result.
Its job is threefold:
- Ensures Adhesion: It creates a tenacious bond with the cabinet surface, giving the topcoat an ideal foundation to stick to.
- Blocks Stains: It seals the wood, preventing tannins, grease stains, or old color from bleeding through your new paint.
- Creates an Even Base: It provides a uniform color and porosity, so your final paint color looks consistent and smooth across every door and drawer.
Selecting the Right Primer for Your Cabinets
Not all primers are created equal. Choosing the correct one is a vital part of how to prep cabinets for painting. For wood like oak or cherry that is prone to tannin bleed, a shellac-based primer like Zinsser B-I-N is the industry standard. For laminate, thermofoil, or previously painted glossy surfaces, a high-adhesion bonding primer is essential. For a professional edge, ask your paint store to tint the primer to a shade close to your final paint color. This can reduce the number of topcoats you need.
How to Apply Primer for a Smooth, Even Coat
Your application technique here sets the stage for the final finish. Use a high-quality angled brush for cutting in corners and detailed areas, and a mini foam or microfiber roller for large, flat surfaces. The goal is one thin, even coat. Do not try to achieve full coverage. A heavy coat will obscure details, create drips, and take too long to cure properly. Always follow the manufacturer’s instructions for dry time before proceeding.
Should You Sand After Priming? (A Pro’s Answer)
Yes. This is a step that separates a good finish from a great one. Once the primer is completely dry, it may feel slightly gritty to the touch. Lightly scuff the entire surface with a fine-grit (220) sandpaper or sanding block. This knocks down any imperfections and creates a perfectly smooth canvas for your paint. After sanding, you must remove every particle of dust with a vacuum and a tack cloth. The surface must be perfectly clean before painting begins.
Proper priming is a detailed process, but it’s the foundation of a durable, factory-like finish. If you want to ensure the job is done right, trust the experts. Contact Cabinet Refinishing Boulder today for a professional consultation.
Prep Work Done: Are You Ready for Painting or a Pro?
As you can see, the process of how to prep cabinets for painting is intensive. It is not a simple weekend project. It requires dedicated space, specialized tools, and a tremendous amount of patience to get every detail right. From thorough degreasing and cleaning to meticulous sanding and priming, each step is critical for a finish that will stand the test of time.
This demanding preparation stage is precisely where most DIY cabinet painting projects fail. A small mistake or a shortcut taken to save time can lead to a finish that peels, chips, or bubbles within months. You have put in the effort to understand the process; now you have a choice. You can tackle this large-scale project yourself, or you can guarantee a perfect result by trusting a professional.
For those considering the professional route, it’s helpful to see what experienced teams offer. As an example of the type of quality to look for, homeowners in Australia can discover Brisbane Roof & Paint, a family-owned business that showcases the kind of durable, high-quality finishes that experts can provide.
The Benefits of a Professional Factory Finish
When you hire an experienced cabinet refinishing company, you aren’t just paying for labor-you’re investing in a durable, beautiful finish that DIY methods can’t replicate. A true factory finish is flawless and built to last.
- Flawless, Smooth Surface: We use professional-grade HVLP spray equipment to apply coatings, which eliminates any possibility of brush strokes or roller marks for a perfectly uniform, glass-like finish.
- Superior Durability: Our team uses high-performance, cabinet-grade coatings that are chemically engineered for high-traffic areas. These products offer superior hardness and resistance to chemicals and moisture compared to any paint available at a big box store.
- Speed and Efficiency: We have a streamlined process that minimizes disruption to your home. We complete the job faster and without the mess, allowing you to get back to your life and enjoy your new kitchen sooner.
Get a Quick, No-Hassle Quote for Your Kitchen
It’s a lot of work, and the stakes are high for your kitchen’s appearance and value. If you want a perfect finish without the hassle, we can help. See the difference that 38+ years of specialized experience makes. We handle the entire process, from meticulous prep to final assembly, ensuring a result that looks and feels brand new. Text us pictures of your kitchen for a fast, free estimate!
Perfect Prep: The Foundation for a Lasting Finish
You now have the professional roadmap for a cabinet paint job that lasts. The key takeaway is simple: success lies in the prep work. Thoroughly cleaning and degreasing every surface, followed by a proper scuff-sand and the application of a high-adhesion primer, are the non-negotiable steps that prevent peeling and chipping down the road. Mastering how to prep cabinets for painting is more than half the battle for achieving a beautiful, durable result.
This meticulous process is our top priority on every project. It’s the secret behind the durable, factory-like finishes we’ve delivered to homeowners in the Boulder area for over 38 years. If you’d rather leave the painstaking work to seasoned experts, we’re here to provide a flawless result without the hassle and mess.
Think this is too much work? Text us for a fast, free quote on a professional finish! Whether you choose the DIY path or hire a pro, you’re now on your way to a stunning kitchen transformation.
Frequently Asked Questions About Cabinet Preparation
Do I really have to sand cabinets before painting them?
Yes, sanding is a non-negotiable step for a professional finish. You are not trying to strip the wood bare, but to scuff the surface. This light sanding removes the glossy top coat and creates a microscopic texture, or “tooth,” for the primer to grip onto securely. Skipping this vital step is why amateur paint jobs fail; the new paint has nothing to adhere to and will inevitably peel and chip. Proper preparation is everything.
What is the best and safest degreaser to use on kitchen cabinets?
Kitchen cabinets are covered in years of cooking grease, even if you can’t see it. For heavy-duty cleaning, a Trisodium Phosphate (TSP) substitute is effective but must be rinsed thoroughly. A simpler and safer option for most homeowners is a quality commercial degreaser like Krud Kutter or a simple mixture of denatured alcohol and water. Never use a soap-based cleaner, as it can leave a residue that interferes with paint adhesion. The surface must be perfectly clean.
Can I paint over stained or varnished cabinets without all this prep?
Absolutely not. Attempting to paint directly over a slick, sealed surface like varnish or lacquer is a guarantee for failure. The paint will have no way to bond with the cabinet and will easily scratch, bubble, or peel right off. Proper cabinet prep, including cleaning and sanding, is the only way to ensure your new finish is durable and long-lasting. Trying to skip these steps will cost you more time and money in the long run to fix.
How long should I wait for primer to dry before I start painting?
Always follow the directions on the primer can, as times vary by product and brand. As a general rule, a high-quality oil-based or shellac-based bonding primer is dry to the touch in about an hour. However, for the best results, we recommend waiting at least 4-6 hours, or even overnight. This allows the primer to fully cure and create the hardest, most durable base for your topcoat. Rushing this step can compromise the entire project.
Is it better to use a roller or a brush for applying primer to cabinets?
For a factory-smooth finish, you must use both. A high-quality angled brush is essential for cutting into corners, crevices, and any detailed profiles on the cabinet doors. For all the flat surfaces, like door panels and cabinet frames, use a 4-inch high-density foam or mohair roller. This combination ensures complete coverage in the details while creating a perfectly smooth, even base on the larger areas, free of distracting brush strokes.
What if my cabinets are laminate or thermofoil, not wood?
Painting laminate or thermofoil cabinets is possible, but the prep is even more critical. These non-porous surfaces require an aggressive scuff-sanding to create a profile for primer to stick to. After cleaning, you must use a specialized, high-adhesion bonding primer like a shellac-based product. Knowing how to prep cabinets for painting when they aren’t wood is a specialized skill; using the wrong materials will result in a peeling mess. This is not a job for amateurs.
How many coats of primer do I need for kitchen cabinets?
One solid, uniform coat of a high-quality, stain-blocking primer is usually sufficient. However, a second coat is a wise investment if you are making a drastic color change, like going from dark cherry to bright white. It’s also necessary if you notice any “bleed-through,” where tannins from woods like oak are staining the primer. A second coat guarantees a flawless, uniform base and prevents any old color or wood stains from ruining your final finish.

