
That dated kitchen is staring you down again. You know it needs an update, but the thought of a full-scale remodel in your Boulder home-and the price tag that comes with it-is overwhelming. Painting the cabinets yourself seems like the perfect weekend solution, a quick and affordable way to get a fresh new look. But what starts with a trip to the hardware store can quickly end in frustration and a finish that looks worse than when you started. Many well-intentioned homeowners make common diy cabinet painting mistakes that lead to peeling, chipping, and outright regret.
Cabinet Painting Service Areas in Lafayette CO, Boulder CO & Surrounding Cities, Cabinet Refinishing in Boulder County, CO
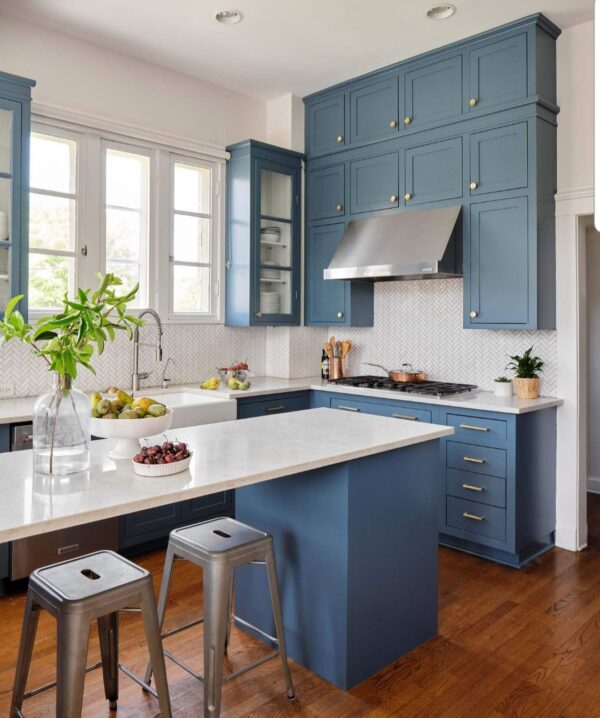
Cabinet Painting in Boulder County & Northern Colorado
Brighton, CO, and Broomfield, CO.
Including Superior, CO, Louisville, CO, Niwot CO,
Lafayette, CO, Erie, CO, Firestone, CO,
Frederick, CO, Longmont, CO, Loveland, CO,
We also service projects throughout the entire state of Colorado.
This isn’t about scaring you; it’s about saving you from a costly headache. In this guide, we’ll expose the seven critical errors that can ruin your project. You will learn why proper preparation is non-negotiable, why the wrong products guarantee failure, and how to spot the pitfalls before they cost you dearly. By understanding these mistakes, you’ll be able to make a confident, informed decision for your home-and see why a professional, factory-like finish is the smartest investment for lasting beauty and value.
Key Takeaways
-
Learn why proper surface preparation accounts for 75% of a professional job and is the first step most DIY projects get wrong.
-
Understand the critical difference between wall paint and durable cabinet coatings to avoid a finish that chips, peels, and fails within months.
-
Discover why a "dry to the touch" cabinet is not ready for use and how rushing the curing process can ruin your hard work.
-
See how underestimating the true time commitment is one of the costliest diy cabinet painting mistakes, leading to rushed work and expensive repairs.
Table of Contents
-
Mistake #2: Skipping or Skimping on Critical Surface Preparation
-
The Smart Alternative: A Professional Finish Without the Risk
Mistake #1: Underestimating the True Time and Complexity
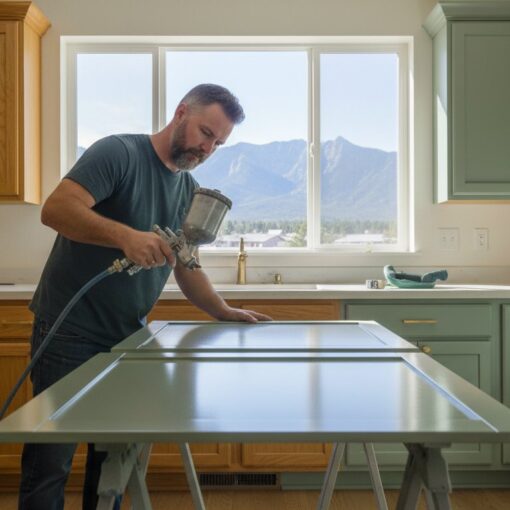
Of all the common diy cabinet painting mistakes, this is the master error that causes all others: underestimating the sheer amount of time and meticulous effort required. Online tutorials often sell cabinet painting as a quick weekend project. The reality for a professional, factory-quality finish is a multi-day, multi-step process that demands patience and precision. Your kitchen cabinets are not walls; they are high-touch, functional surfaces that face daily wear and tear. A typical kitchen in the Boulder area has 20 to 40 individual doors and drawers, representing a massive surface area that must be flawlessly prepared and coated.
To see why rushing the prep work is such a critical error, watch this video:

Ignoring the Condition of Your Existing Cabinets
A professional’s first step is always a thorough assessment. Are your cabinets covered in years of cooking grease? Is the original varnish peeling or cracking? Was there a previous bad paint job? Each of these issues can add days of stripping, sanding, and cleaning to the project timeline. Simply painting over these problems is a guarantee of failure, leading to peeling, chipping, and a finish that won’t last. A realistic timeline begins with an honest evaluation of the starting point.
The ‘Domino Effect’ of Rushing
Once you fall behind an unrealistic schedule, a domino effect begins. You start skipping the vital degreasing step. You sand less thoroughly than you should. You apply a second coat of paint before the first is fully cured, trapping solvents and creating a soft, easily-damaged surface. Rushing also leads to poor choices, from using the wrong primer to grabbing incorrect paint, when a proper understanding paint types is vital for a durable finish. Patience is the most important, yet most overlooked, tool in a DIY cabinet painting project. A professional’s timeline is built on efficiency and proven systems, not on rushing a process that cannot be hurried.
Mistake #2: Skipping or Skimping on Critical Surface Preparation
In a professional cabinet refinishing project, 75% of the work happens before a single drop of finish is applied. For most DIY projects, preparation is the first corner that gets cut, leading to disastrous results. This is the single biggest difference between a durable, factory-like finish and a peeling, amateur job that fails in less than a year. Overlooking this step is one of the most costly diy cabinet painting mistakes a homeowner can make.
The ‘Fish Eye’ Effect: Painting Over Grease and Grime
Years of cooking leave a thin, often invisible film of grease on cabinet surfaces. When new paint is applied over this film, it cannot adhere. Instead, the paint separates, retracts, and forms small craters known as ‘fish eyes.’ This is the most common sign of an amateur job. Household cleaners are not strong enough to remove this residue; a professional-grade degreaser is required. Once fish eyes appear, the only solution is to strip the entire surface back to bare wood and start over, wasting all your time and money.
Improper Sanding: The Difference Between Scuffing and Smoothing
Many homeowners think sanding is meant to remove the old finish entirely. This is incorrect and can damage cabinet veneers. The actual goal of sanding is to "scuff" the surface, creating a microscopic profile-or ‘tooth’-for the primer to grip onto. Under-sanding leaves the surface too slick, and your new paint will eventually peel off in sheets. Equally important is cleaning all the dust after sanding. Even a small amount of leftover dust will mix with your primer, creating a gritty, unprofessional texture.
Using the Wrong (or No) Primer
Primer is non-negotiable for a lasting cabinet finish. It serves two critical functions:
-
Adhesion: It acts as a bonding agent, ensuring the new paint chemically and mechanically sticks to the old surface.
-
Stain Blocking: It seals the wood to prevent tannins, especially from oak grain, from bleeding through and causing yellow or brown blotches in your new paint color.
Do not be tempted by ‘paint and primer in one’ products from the hardware store. These are formulated for drywall, not the high-use, non-porous surfaces of kitchen cabinets. Skipping a dedicated bonding primer is a guarantee that your cabinets will chip easily and show uneven, blotchy color.
Mistake #3: Using the Wrong Paint and Application Tools
Many homeowners believe that a high-quality wall paint is good enough for their kitchen cabinets. This is one of the most common and costly diy cabinet painting mistakes we see across the Denver area. The simple truth is that cabinets are not walls. They are high-touch, functional surfaces that endure daily abuse from heat, moisture, grease, and constant handling. The coating you choose must be engineered for that specific environment.
Choosing Wall Paint for a High-Touch Job
Standard latex or acrylic wall paint is designed to dry, but it never fully "cures" into a hard, durable shell. On a cabinet door, this results in a soft, pliable finish that remains slightly tacky. You will notice doors sticking to frames, and every accidental scrape or bump will likely cause a chip or scratch. Worse, this soft finish cannot be effectively scrubbed to remove kitchen grime without damaging the paint itself. Professional cabinet coatings, in contrast, are chemically formulated to cure into a hard, non-porous, and resilient surface that is built to last.
The Inevitable Brush and Roller Marks
Another classic DIY cabinet painting mistake is believing the right brush can deliver a smooth finish. Even the most expensive brush or finest foam roller will inevitably leave texture behind. These tools are simply not designed for the perfectly flat, smooth surface of a cabinet door. The result is a finish defined by visible brush strokes and roller stipple-a clear sign of an amateur job that cheapens the look of your entire kitchen.
A true, professional result is a flawless, smooth-as-glass surface often called a factory-like finish. This is only achievable through a controlled, professional spray application. Spraying atomizes the coating and applies it in thin, even layers, creating a seamless and incredibly durable surface that looks and feels like it came directly from a high-end cabinet manufacturer.

Mistake #4: Rushing the Curing Process and Reassembly
After days of work, your newly painted cabinets look fantastic. They feel dry to the touch, and you’re eager to get your kitchen back in order. This is where one of the most heartbreaking diy cabinet painting mistakes occurs: confusing "dry" with "cured."
Paint that is dry to the touch is simply a surface-level state where the solvents have evaporated. Curing, on the other hand, is a much longer chemical process where the paint molecules cross-link and harden into a durable, scratch-resistant shell. This process is critical for the longevity of your cabinet finish. Depending on the coating used and the environment, full curing can take anywhere from 7 to 30 days. While Colorado’s dry air can help speed up the initial drying, it does not eliminate the crucial curing window.
Living with your kitchen in disarray for weeks is a major drawback of a DIY project. A professional process is designed to minimize this disruption.
Re-Hanging Doors and Drawers Too Soon
Reassembling your kitchen before the paint has fully cured is a recipe for disaster. The weight of a door hanging on its hinges can cause the soft paint to sag or peel. Worse, a freshly painted door can literally fuse to the cabinet frame. The first time you open it, you’ll tear a strip of the new paint right off, ruining hours of your hard work and requiring a difficult repair.
Putting Hardware Back on Prematurely
The same principle applies to your knobs and pulls. Tightening a screw into a soft finish will leave a permanent, indented ring around the hardware. This pressure can also cause the paint to crack and spiderweb from the screw point, creating a weak spot that will inevitably chip and fail. This is a tell-tale sign of an amateur job that professionals are trained to avoid.
At Cabinet Refinishing Boulder, our process accounts for proper curing time. We transport your doors and drawers to our shop, where they cure in a controlled environment. This ensures maximum durability and a flawless finish without turning your home into a construction zone for a month. To learn more about our proven system, visit cabinetrefinishing.info.
The Smart Alternative: A Professional Finish Without the Risk
As we’ve seen, attempting to paint your own cabinets is a gamble. It risks your time, your money, and the final appearance of your kitchen. Many of the most common diy cabinet painting mistakes stem from a lack of specialized equipment and experience, leading to a finish that quickly fails or simply looks unprofessional.
Hiring a specialist isn’t an expense; it’s an investment in certainty and quality. Homeowners often find that the cost to fix a peeling, poorly prepped DIY job is significantly higher than it would have been to hire a professional from the start. A professional service eliminates the stress, the mess, and weeks of disruption, getting your kitchen back to you quickly and with a guaranteed beautiful result.
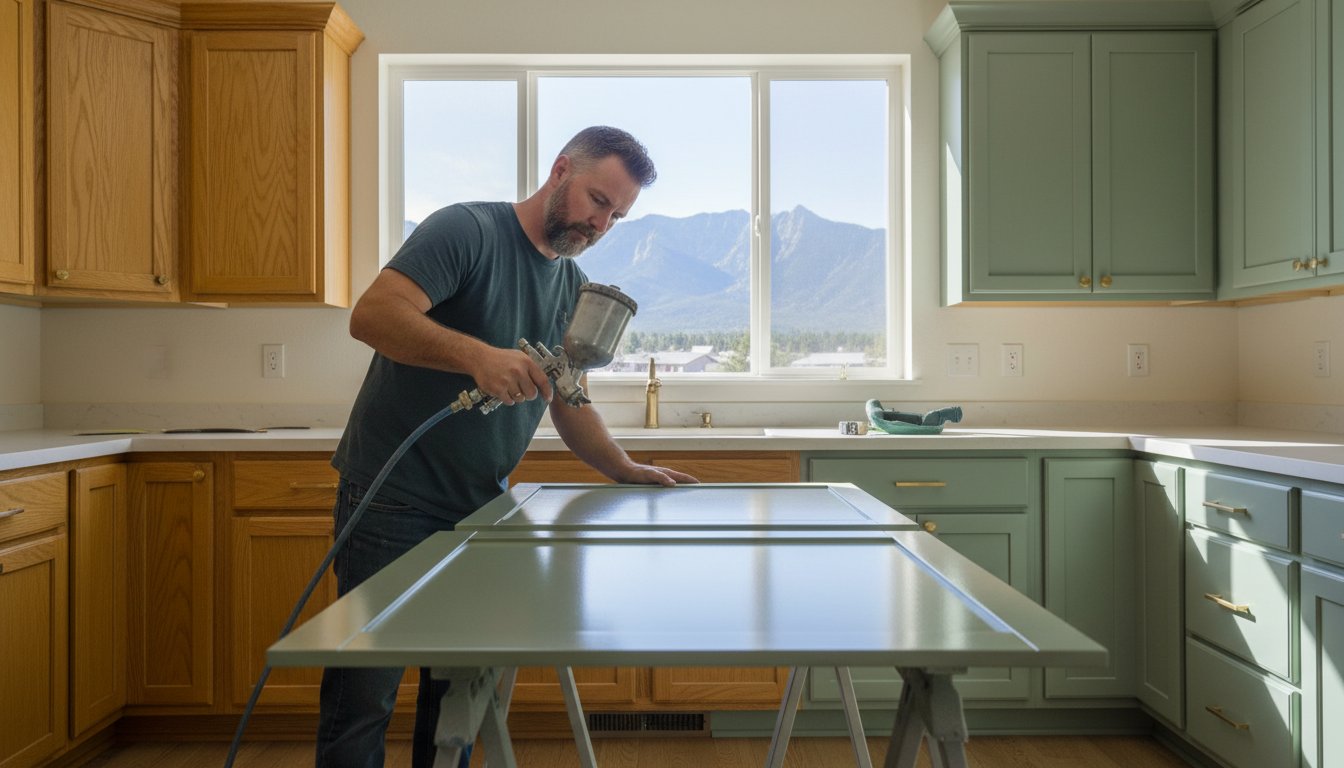
What a Professional Process Looks Like in Boulder
A true cabinet refinishing expert follows a meticulous system that big-box store paint and a weekend of work cannot replicate. Our process in the Boulder area ensures a flawless, durable finish every time:
-
Complete Kitchen Protection: We professionally mask all floors, countertops, appliances, and walls to contain our work area completely.
-
Intensive Preparation: Every surface is thoroughly degreased, cleaned, and sanded to create the ideal surface for adhesion.
-
Expert Priming & Spraying: We apply a high-adhesion primer followed by multiple coats of industrial-strength, hard-wearing coatings-not latex house paint.
-
Off-Site Finishing: To minimize disruption, your cabinet doors and drawers are taken to our shop for a perfect, dust-free spray finish.
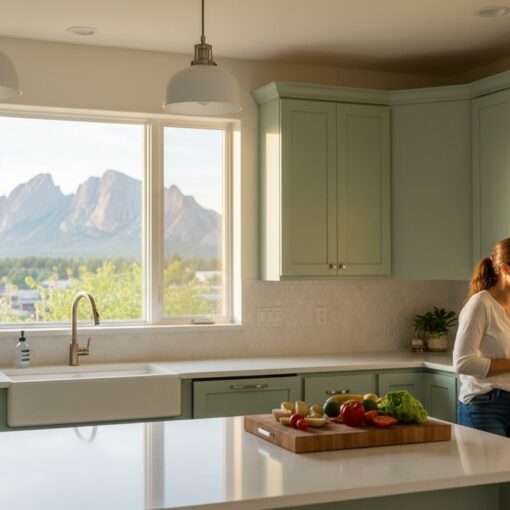
Get a Lasting, Factory-Like Finish
The difference between a brushed-on finish and a professionally sprayed finish is dramatic. A sprayed application creates a smooth, hard, and seamless surface that looks like it came directly from the factory. This isn’t just about aesthetics; this durable finish is built to withstand daily use, resisting chips and stains for years to come. It’s a long-term upgrade that protects your investment and increases your home’s value.
Avoid the headache. Get a free, no-obligation estimate for your cabinet refinishing project today.
Avoid Costly Mistakes: Trust Your Boulder Cabinets to the Experts
As we’ve seen, what seems like a straightforward weekend project can quickly turn into a costly and frustrating ordeal. The most common diy cabinet painting mistakes stem from underestimating the meticulous preparation required and choosing the wrong paint and tools for the job. A peeling, uneven finish is not the update you envisioned for your Boulder home.
Why risk the heart of your home? For over 38 years, Cabinet Refinishing Boulder has provided local homeowners with a reliable, professional alternative. We specialize in durable, factory-like spray finishes that DIY methods cannot replicate. Our entire process is built on meticulous preparation, guaranteeing a beautiful result that is built to last.
You deserve a flawless kitchen update without the stress. Get Your Free Cabinet Painting Quote for Your Boulder Home today and let our experience deliver the quality you expect.
Frequently Asked Questions About Cabinet Painting
How much does it cost to fix a bad DIY cabinet paint job?
Fixing a failed DIY paint job often costs more than hiring a professional from the start. The process requires completely stripping the old paint, extensive sanding to repair the surface, and then beginning our multi-step refinishing process. This intensive labor is necessary to correct issues like drips, brush marks, and poor adhesion. It’s far more efficient to invest in a professional factory finish the first time to ensure quality and durability for your Boulder home.
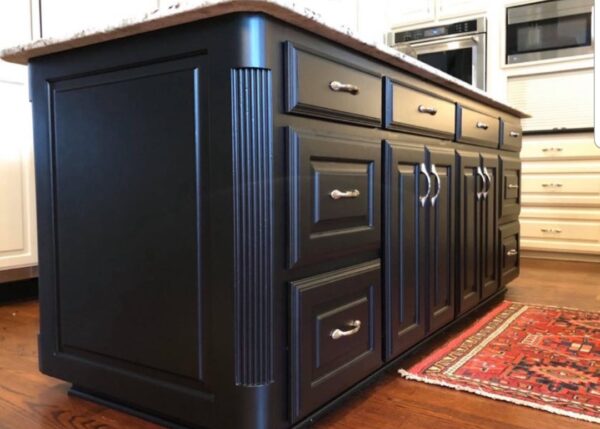
Can you paint over oak or other wood-grain cabinets without it showing through?
Yes, but it requires a professional refinishing process, not just a coat of paint. To achieve a smooth, modern finish, we use high-build primers and sometimes grain fillers to minimize the heavy texture of oak. Simply painting over the grain with a brush or roller will not hide it. Our spray application and specialized coatings are designed to create a uniform surface that conceals the underlying wood grain for a truly updated look in your kitchen.
Is it really necessary to take the cabinet doors off to paint them?
Absolutely. For a professional, factory-like finish, removing doors and drawers is non-negotiable. This allows us to prepare and spray every surface evenly in a controlled environment, eliminating drips and ensuring full coverage. Painting cabinets while they are still hanging is one of the most common diy cabinet painting mistakes. It’s a shortcut taken by amateur painters that guarantees a subpar result and compromises the final quality of the project.
How long does professional cabinet painting take compared to DIY?
A professional cabinet refinishing project is significantly faster and less disruptive than a DIY attempt. Our experienced team in the Boulder area typically completes the in-home work in just a few days, while doors and drawers are finished at our shop. A DIY project can easily stretch over several weeks, leaving your kitchen in chaos. Our proven system ensures a quick turnaround so you can get back to enjoying your home with minimal interruption.
What’s the difference between cabinet painting and cabinet refinishing?
Cabinet painting often refers to a simple application of paint, usually with a brush and roller. Cabinet refinishing is a comprehensive, professional process. It involves meticulous prep work-degreasing, sanding, and masking-followed by the spray application of specialized, industrial-grade primers and coatings. This method creates a durable, smooth, factory-like finish that cannot be achieved with basic house paint. We specialize in professional refinishing, not simple painting.
Will painted cabinets chip easily?
Cabinets painted with the wrong products, like standard latex wall paint, will chip very easily. However, professionally refinished cabinets are extremely durable. The key is meticulous preparation to ensure proper adhesion and the use of high-performance coatings specifically designed for cabinetry. Our process creates a hard, resilient finish that withstands the daily wear and tear of a busy kitchen, providing a look that lasts for years without chipping or peeling.
Can I paint over laminate or thermofoil cabinets?
Yes, laminate and thermofoil cabinets can be successfully refinished, but it demands specialized knowledge and materials. These non-porous surfaces require an extreme bonding primer to ensure the topcoat adheres properly. Using the wrong primer is a critical mistake that causes the paint to peel. As professionals serving Boulder homeowners, we use the correct products and techniques to guarantee a durable, long-lasting bond on these challenging surfaces.

